Coloring Quilts

A new client called and asked me if I would be willing to quilt some designs for a coloring quilt. She sent me a few pictures of what she had in mind and I told her "Yes, I would love to". After discussing what she was looking for she decided to have me quilt 2 coloring quilts! One quilt all lines with ending points and for the second one anything I wanted. The one above is the second one. This project was a ton of fun and I want to make some coloring quilts of my own.
Here is a list of what we used to get started.
Supply List for Quilting


Signature Black Thread
Blue Water Soluble Marker - you can buy these at all fabric stores even Wal-Mart carries them.
Blue Water Soluble Marker - you can buy these at all fabric stores even Wal-Mart carries them.
Fabric:
Kona Black Fabric & Kona White Fabric for the White Fabric (Prepared For Dye-PFD) is your best option if you are unable to find PFD you can just PreWash your fabric.
I received a question after this was posted and I wanted to add it to the Post. Just in case you miss the question/comment section.
Question: Why did you use two layers of batting? Does that make it easier to color or just to make it puffier?
Answer: Definitely, the double layer makes it puffier and also helps with the paint bleeding through too much. The black batting next to the Black fabric keeps the white batting from poking through and leaving little beards. The Wool batting on top keeps the top fabric from looking dull.
Extra : This Dullness would come from the Black batting showing through the white fabric.

The first one was filled with lines that ended. The centers are all different from the others.
For this quilt I marked the whole quilt while on the frame using my straight edge ruler.
Definitely a skill tester.


Even though I have marked out the design I will still change it up a bit. Sometimes once the thread is down, a different design may work better than your original motif.
Never be afraid to change your mind and try something new, it just might be better than your original idea.

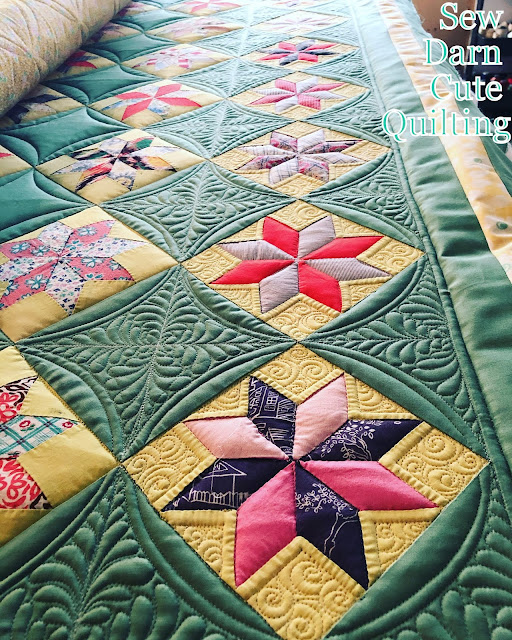
The second quilt was filled with swirls, lines, leaves, feathers and spiro-quilting. The only marking I did on this one was for the Spiro-quilted Circles. The rest was going with the flow and adding some lines with my straight edge ruler.


A peak at the back, the way this quilt puffed up was amazing. I'm sure it is due to the double batting. Unfortunately when I completed these two quilts, it was raining. So my normal outdoor wilderness pictures were unable to happen.

Both quilts were a ton of fun and tested me in different ways.
One being precision and one creativity.
You should try it out.
Thank you, Rhonda for letting me help you with this fun project. :)
Thank you, Rhonda for letting me help you with this fun project. :)
Some Helpful Videos
https://www.youtube.com/watch?v=aVQPscsAQJ8

This is so cool! Your quilting is amazing. I have been looking at quilting a whole cloth to practice some quilting, but now seems like I might make some to color as well. Why did you use two layers of batting? Does that make it easier to color or just to make it puffier?
ReplyDeleteDefinitely, the double layer makes it puffier and also helps with the paint bleeding through too much. The black batting next to the Black fabric keeps the white batting from poking through and leaving little beards. The Wool batting on top keeps the top fabric from looking dull. This is such a great question I'm going to up date the post with this info. Thank you, April
DeleteThese are fantastic!!
ReplyDeletehappy quilting ~ Tracy
Thank you :)
DeleteGreat quilting, Rhonda!! You are very inspiring!
ReplyDeleteThnak you :)
DeleteWow these are fantastic. Hopefully you will see a photo of them once they are coloured.Thanks for the video links. Think I might have to try this, it looks alot of fun.
ReplyDeleteImpressive work.
ReplyDelete