Birdie
GET READY!!!
This one's a big one. Filled with many quilting tips.
Along with a Spectacular Story.

Receiving Birde
The Lovely Lady that this quilt belongs to is Carolyn Vest. Carolyn meet me at my mother's eye doctors' office to bring me her quilt. Along with her quilt top and backing, she brought Wool Batting. Also, a printed paper with contact info along with her quilting preferences, which was wonderful. If you quilt for the public it is always nice to know what your client prefers and most of all what they do not prefer. While we were talking she had told me that she had brought her mother to this same eye doctor. Carolyn had Hand Appliqued this quilt while she was waiting at the doctors' office with her mother. The idea of her and myself waiting with hope in the doctors' office for our mothers, touched me.
I asked Carolyn if she would like to give her story of this quilt and this is what she sent to me.
I first saw the Birdie Birdie pattern in 2011 when Raquel White from Melbourne, Australia, presented her version of this quilt at Show and Tell for the NW Arkansas QUILT Guild. She was in the U.S. for about a year as her husband worked for Walmart.
I purchased the Birdie Birdie pattern by Susan Smith in April 2011 from her now-closed shop, Patchwork on Stoneleigh. My Birdie quilt is my adaptation of this pattern with changes to the ribbon position; medallion in the center is on point now a square within a square, and borders were added to make this a full sized bed quilt. After adapting the pattern and gathering various fabrics for all the flowers, I started on "Birdie" around April 2012. It was finished in December 2015. During that period, I was also taking care of my elderly Mom who died in March 2014. This quilt reminds me so much of my mother, as she enjoyed seeing me work on it and it helped me to mourn her death.
A picture of the original Birdie Birdie pattern can be seen at patchworkonstonleigh.typepad.
 |
| Original Birde Quilt |
Another fact about my quilt. I also changed the bird from the original Birdie pattern and drafted a pattern of a cardinal - red bird. I recently read that according to Native American folklore when you see a cardinal, it is a sign of a spiritual messenger or an angel paying you a visit. Perhaps that's another reason that quilt reminds me so of my Mom!
I love this story about the Cardinal. I recently had a dear friend tell me this same story about the Cardinal, she too had lost her mother.
Birde:

My Preview Process.
When I put a quilt on the frame, I then hang the next one up. So all kinds of ideas can float around in my head, mostly before bed. The Motifs that Carolyn said she loved were Feathers, Cables, Swirls, Leaves, Crosshatching, Etc. She wanted a more traditional softer look. We also spoke of Birds or Butterflies.
Tools for the job
Truthfully, this quilt made me nervous but, all the Great ones do.

For me, I really can't get the complete quilting idea down until I put the quilt on the frame.
I decided that all borders are going to be the same.
The motifs that I am best at are Feathers, Crosshatching, and Swirls.
The motifs that I am best at are Feathers, Crosshatching, and Swirls.

Above: The feathers come out of the green border embracing the flower.

Out of a coloring page, I cut out this hummingbird and traced it with Blue Mark Be Gone onto the fabric, then I quilted it.
This bird is on the quilt 8 times.
See if you can find them.
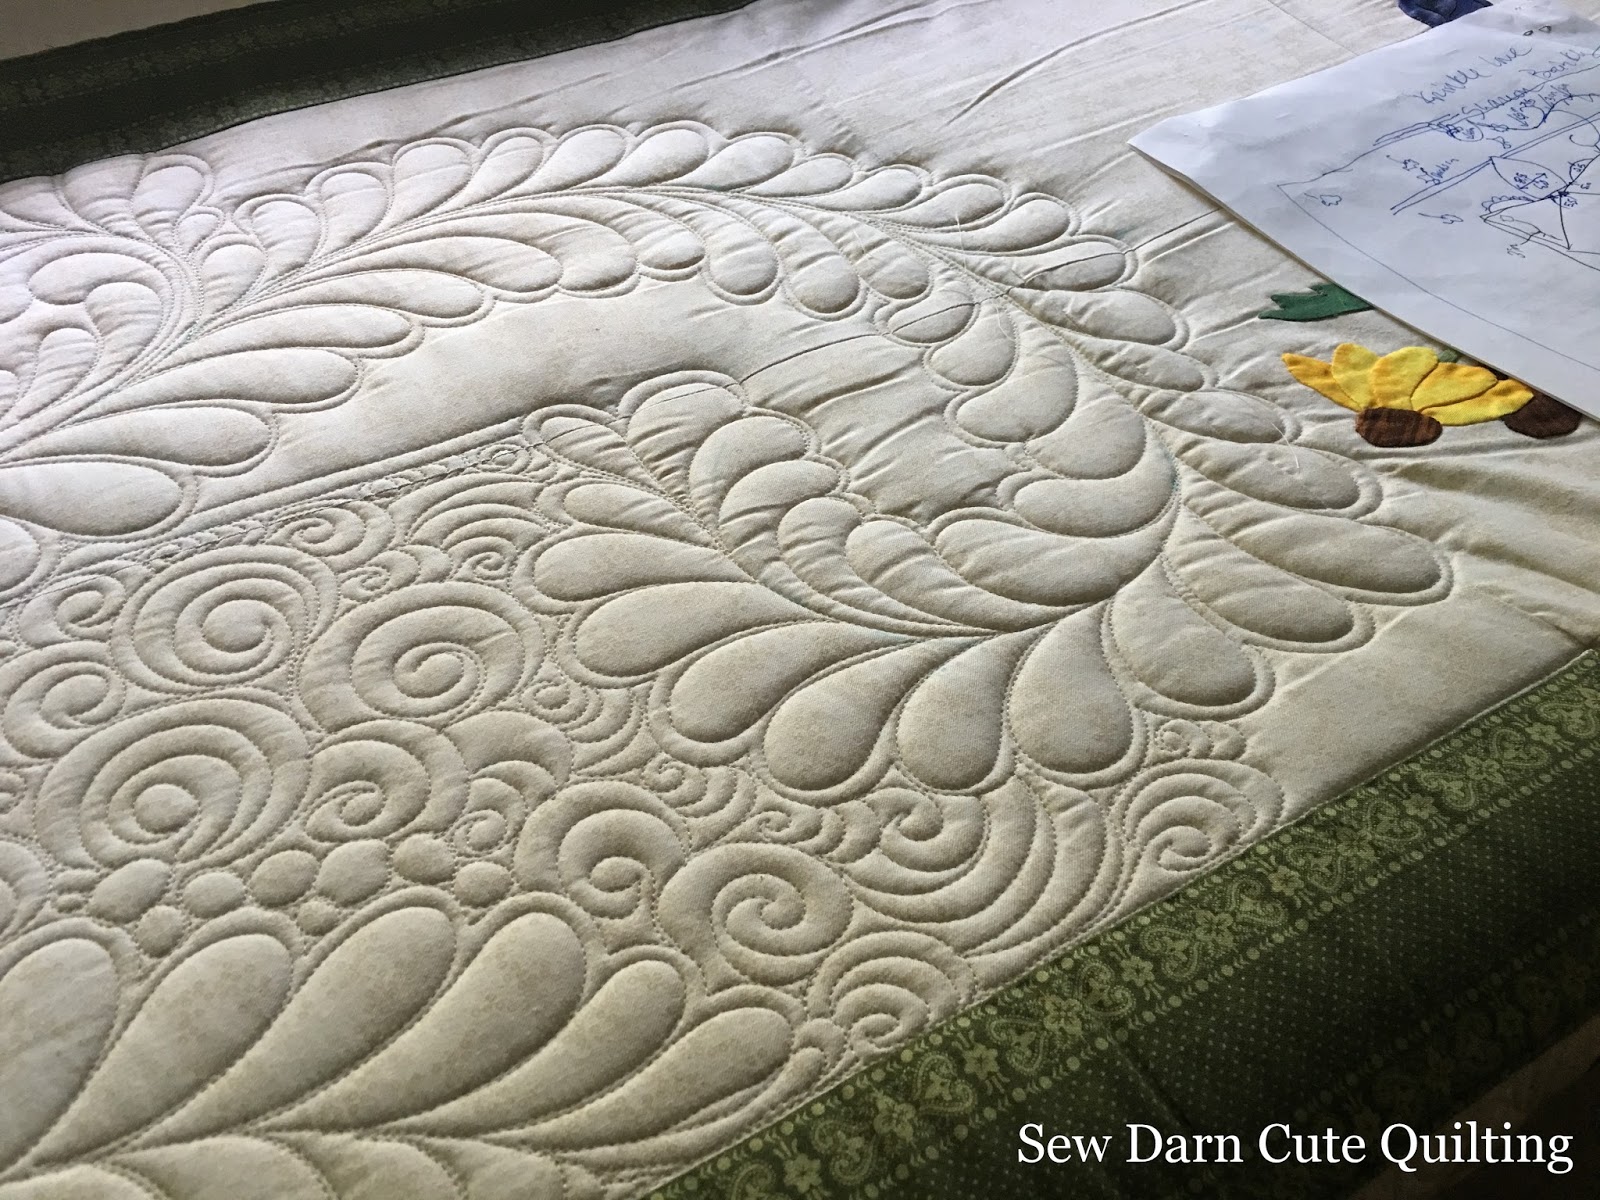
Since I had such Wide Borders to work in I wanted to show a divide. A 1/4 inch line went around the whole quilt in a square. This line was behind the Feathers and Birds but on top of the Swirls, Pebbles and Random Leaves.

Below: The Centered Medallion framed up 8 of these Flowers.

The Inner part of the 1st border was done.
Now to make a Mud Map
(A map of all quilting points and how far each point is from one another)
(A map of all quilting points and how far each point is from one another)

It might not make any sense to you but it did to me. With all the borders the having the same motif it can be difficult to remember when you are working on the bottom border what you did on the top border.
The makings of my Mud Map
1st I drew a rough diagram of the quilt.
2nd A drawing of the center motifs and where the applique is placed
3rd Make measurements (like how far in the spine of the feather is from the quilt border)
4th Draw on Feathers, Medallions, Birds, etc, with all of the measurements.
5th make sure to know how far apart the motifs are from each other.

At the bottom of my map, I wrote out the order in which the motifs are applied. Since this quilt has overlapping designs they all need to be quilted in a particular order.

This doesn't have to be something that drives you crazy.
So keep it somewhat simple.
Also, TAKE PICTURES you will need them.
I put all the pictures on my computer screen for reference. Making every detail clear.

With the Mud Map, it makes marking the quilt so much easier.

Knowing the distance between quilting points keeps your quilt symmetrical.
Not perfect but close enough.
Below you can see that I (X) out a line. This does not need to be erased just clearly marked.

A Brief Background...
At this point, my mom's eyes were getting much worse. We were at the doctors' office quite frequently. She has lost more than 80% of her vision to Glaucoma and the rest was disappearing fast. She also has a rip on her cornea and the pain has been unbearable. Before her eyes began to vanish she received her Masters in Medical Illustration and has always been a very detailed watercolor artist. She was an underwater artist, scuba diving while sketching underwater scenes. Some of these dives I was with her, fish surrounding her while she would sketch. (She used vellum and a drawing pencil, just in case you were wondering.)Now watching her loss her vision and being unable to do the things she loves, it is heartbreaking.
It was also time to begin our homeschooling. The curriculum needed to be pulled together and we had just joined a Social Group. So to say the least my time was vanishing and my time for quilting was getting away from me.
Now I was getting way behind on all of my quilts. I was frazzled, to say the least. Trying to keep up with obligations while calling Carolyn and telling her every week that it will be next week. Every time I tried to quilt, clean, homeschool setup I would run around in circles, not getting a thing done. AHHHHH.
This was the point that I reevaluated my priorities.
I discussed how I was feeling with my husband because he always has better options than I can think of. He suggested that I stop quilting for the public and do my own thing.
This meant...I could go back to The Love of Quilting.
He also wanted clean laundry.
I called Carolyn and some of my other clients that I have quilts from and informed them what was going on.
I let everyone know that if I had a quilt of theirs or had told them that I would quilt for them, then I would still quilt their quilt but I could not commit to a time limit. I also talked to them about bringing back their quilt if they did not want to wait. Everyone was very understanding.
Now there were No Deadlines.
(Truthfully, these deadlines I had placed upon myself)
Deciding this change has made a huge improvement on my state of mind and my state of quilting.
We can only handle so much.
Sometimes we think we can do it all and we feel like a huge disappointment if we don't.
As Carolyn said to me many times,
Faith, Family, and Friends
Reevaluating and making changes to the things that are not working in your life, is being a strong person that knows when to say NO to being overwhelmed. High expectations will knock you down every time.
Back to Birde...
Once the top center border was done.
I moved on to the center Medallion. It was filled with tons of applique.
Crosshatching was going to be quilted in the background.
If you plan on doing any kind of crosshatching I highly suggest a stencil.

Quilting around Applique.

I tried out so many different rulers to help me.

The Mystical Mini from Quilters Apothecary. Which worked well. This is the righty version. I feel that the way I pull the hopping foot with the ruler was opposite to what I felt was comfortable. I would like to try the Lefty ruler and see if it makes a difference. This is not anything against the tool it is just how I quilt that may be different. Quilters Apothecary has the highest quality rulers out there. I also suggest checking out all of their youtube videos.

This is the Applique ruler from Linda Taylor. As you can see below you place your foot into the ruler then move the foot by placing your hand on the sides of the ruler. This one felt a bit off, too. A bit awkward to grip and hard to see around.

So I tried to turn it around and NO.
It's great for clamshells.

Finally, a flat edge small ruler that I can place my palm over and move around was perfect.
This ruler is from Handi Quilter it is called The HQ Mini Ruler.

Most of the time I did not use a ruler I just kept my eyes ahead of what I was quilting around.
This method worked best for me but be sure to practice and with practice comes confidence.

Being confident forms determination.
Which means you can do anything. Just take your time, plan, then quilt.

At first, I thought that I was going to crosshatch the entire center of the quilt. The longer I looked at it the more I thought that it needed a bit of a change.

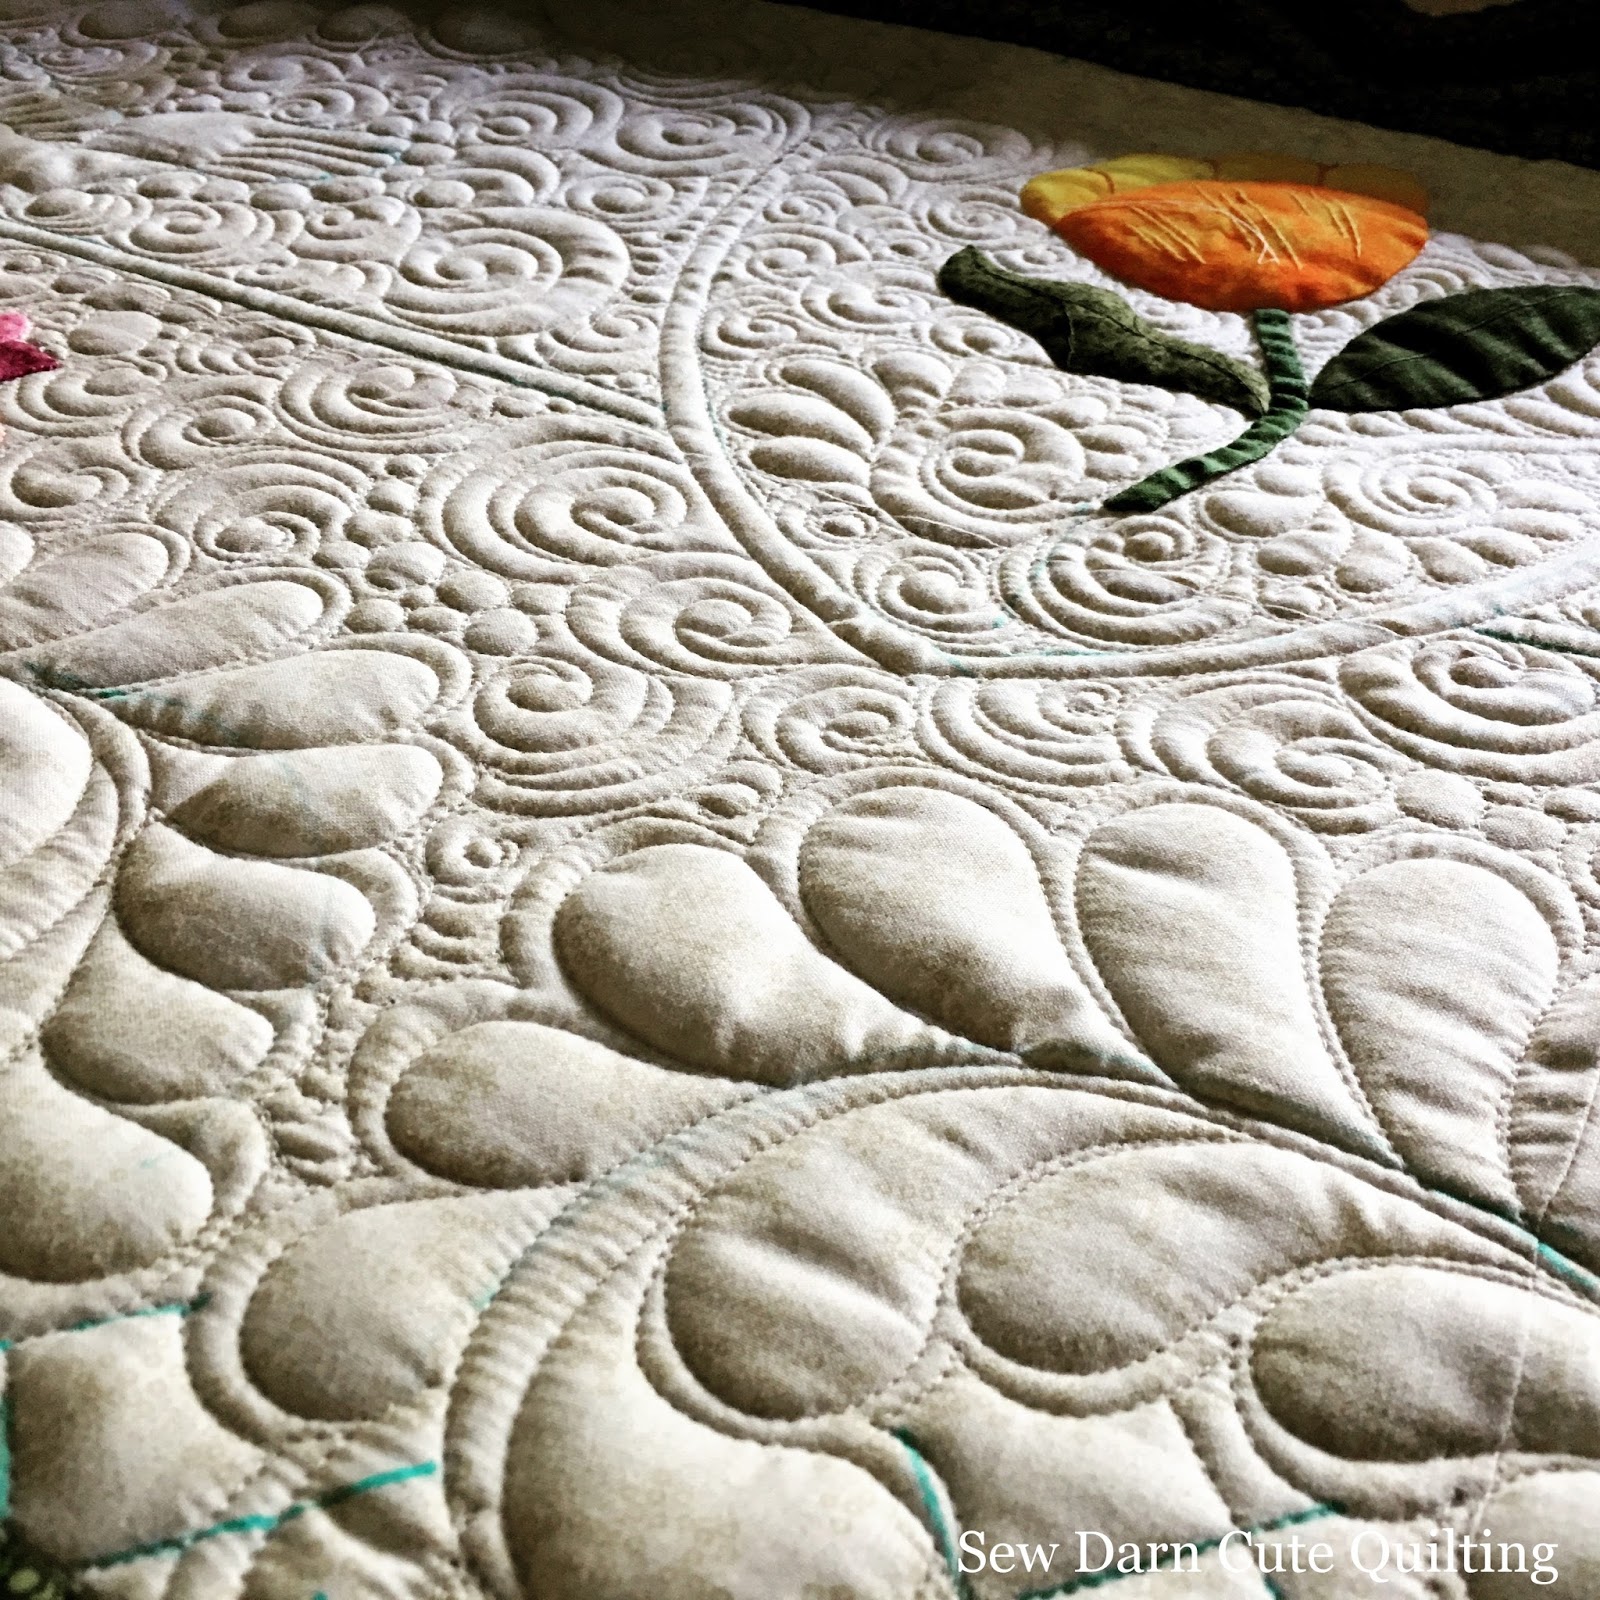
Inside of the green wreath are swirls.
I always like a good mixture of straight lines and curved lives.


As I was quilting both of my boys brought me a present. :)
These 2 bracelets were the beginning of a bracelet extravaganza.


Above: This Urned feather was on the four edges of the center medallion.

The urn is the same one from inside the medallion.
With printer paper, I traced out the design then folded it in half before cutting it out.
Folding it in half will make sure that your design is symmetrical.

This quilt was quite a large quilt (96 x 96) and using just the clamps to pull it taut was not working at all times. So, I decided to baste it.

Basting your quilt will help keep all of your layers where they are supposed to be.

Especially when turning your quilt.

Still, use your clamps!
I use Red Snappers to attach my quilt to the leaders on the longarm. I love them! Except when you get to the bottom of your quilt and you are trying to pull it and make sure that it is flat. Which at the end of a quilt this can be tricky. With all this tension and such a wide quilt on the red snapper, they can pop off.

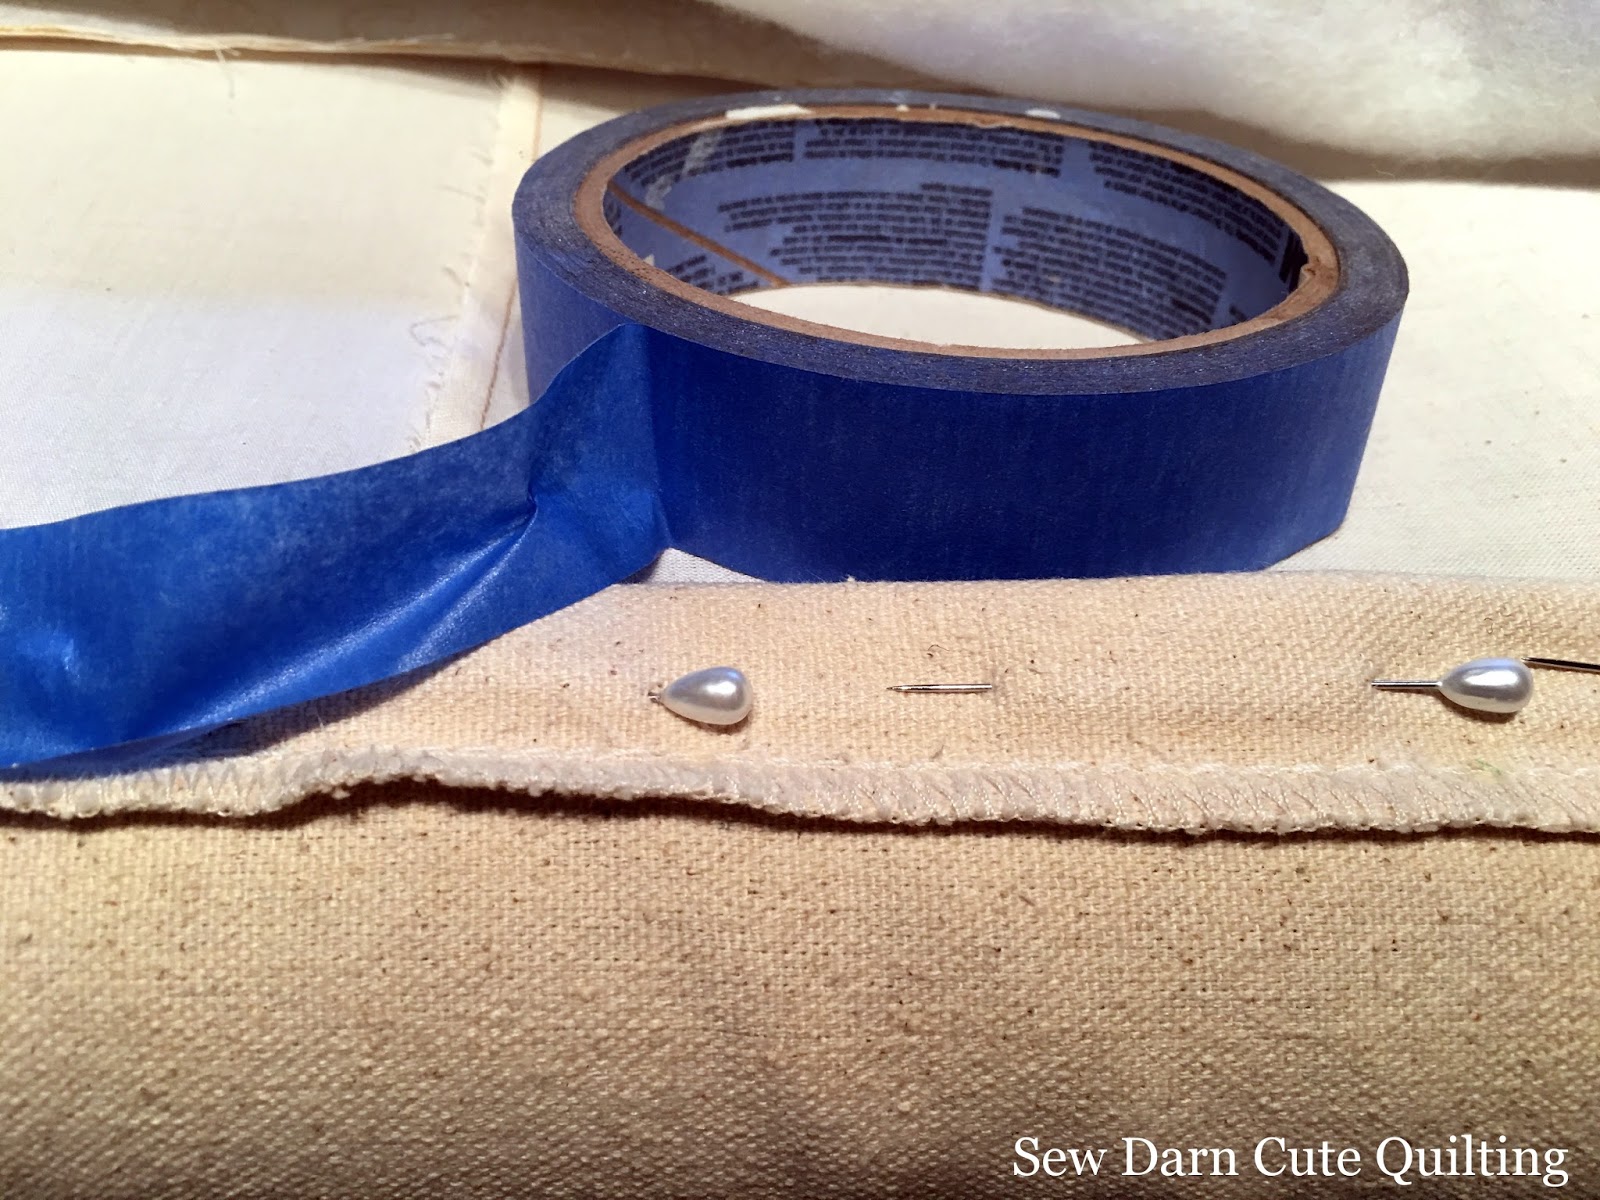
What I recommend is to use the red snapper for the top and pin at the bottom.
If you cover your pins with painters tape this will keep you from being pricked.

Do the same technique when you flip it.

I love flipping a quilt.
This gives you a good chance to inspect the back and to see it puff up in all the right places.
3rd and 4th Borders...

Using my map for marking my quilting points.

As I moved onto each border it all became easier and faster.

I was back in the groove.

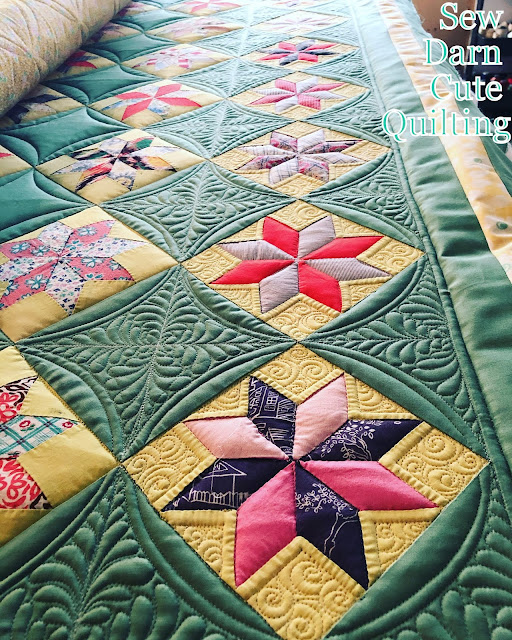
As each center part of the borders become complete it was time to focus on the corners. Each corner had a flower or bouquet in it. I enhanced them with a curved medallion filled with swirls and pebbles.

Also finishing the 1/4 inch line to make a corner and fill in the background.

Crosshatching is around the whole outer edge of the quilt.

Using a mark to help guide me while quilting the swirls. Making sure that there is enough room for the crosshatching.
Remember there is an order to the quilting motifs.

Otherwise, you will have to UNSEW.
Ooops
Sometimes when quilting along you will miss a stitching line.

No problem, Stick a pin in it!
This is also helpful for the back. Make sure that your pins are parallel to your rails.
This way you can still roll your quilt.
Now that the quilt is complete.
The blue lines must go.

So, I sprayed and sprayed but the blue blots kept coming back and now they were showing up in the back. Finally, they came out.
While spraying, one of the red flowers bleed. Eeeeek.
Unfortunately for you, I did not take pictures.
This was a big lesson in Blue Mark B Gone. After some research, I found a product called
Sew Clean (here is a great video) that you can put it in an applicator to remove the blue marks permanently.
For now on I will be using the Purple disappearing marker or white chalk.

So what about that bleeding flower?
I used Grandmas Secret Spot Remover
It Worked!
Picture Time...
I took pictures at 3 different settings.
In the Woods


The back in the Woods

In the Evening off the deck.


In the Morning Sun off the deck.


A good picture of the back.

Most quilts speak to me, this one was definitely speaking to me.
I just wanted to make sure that I was listening, without Life interrupting.
Once it was on the frame I became flooded with ideas. I was very intimidated at first by the story that this quilt has, the white space, and the applique.
Once I stepped into the quilting with confidence, I was flying.

Thank you, Carolyn, for all of the encouragement along the way and for all the faith that you have in me.

OMG!!! What a beauty! April it's gorgeous! Congratulations on a job well done! I also have had problems with the blue marking pen. I will never use one again. I won't use the purple either. It disappears but can come back. Besides it's a chemical and we don't know what a chemical will do over time to the cotton fibers in the quilt. Just my opinion. The blue is the worst! I'm so glad you were able to get it out. It would have been tragic!
ReplyDeleteThank you so much Dana. I know it's a tough decision. Sometimes you have to make a mark. :)
DeleteYour quilting is absolutely gorgeous on this, April!! (I had a really hard time getting my blue marks out of my latest quilt, too! You must have been sick when that red bled ~ so glad the cleaner took care of it!!)
ReplyDeletehappy quilting - at your own pace,
Tracy
I was, I think I stopped breathing. Thank you Tracy
DeleteApril, it's been my pleasure to get to know you, and to meet your two sons and your sweet Mother. Please accept my sincere and grateful appreciation for your beautiful and creative quilting on my Birdie quilt! There are many stories surrounding this quilt in the pattern adaptation, the background, the applique and now in the longarm quilting, which is the crowning glory! I believe you have a unique talent for choosing quilting that displays the best of the quilt top. While I understand the busy life and responsibilities of a family with elementary school age children (I have boy-girl twins grown now with families of their own) I do hope you will continue longarm quilting at your own pace and with NO deadlines as you have a God-given talent. Creativity such as yours should not be rushed!! THANK YOU, THANK YOU, my Friend!
ReplyDeleteCarolyn Vest
Thank you Carolyn
DeleteYou will always have a special place in my heart.
This is incredible! Thanks for sharing your journey! I found it enlightening and motivating.
ReplyDeleteThank you KaHolly
DeleteApril, What a MARVELOUS quilting job you did on Carolyn's quilt! It is so creative and beautiful and perfect in every way. I hope you will take Carolyn's and others' advice and continue to quilt for others at some point in the future at your own pace and with no deadlines. I think most people would be understanding of your need not to feel pressured about turn-around times. Of course, regardless of whether you ever do any more quilting for the public, we will still cherish you in our quilting community. Carla Gay
ReplyDeleteThank you Carla
DeleteYou are one of the quilters that I told I would quilt for. When you finish your quilt and if would like me to quilt it. I would love to. I'm so curious to see what you have been working on. April
Absolutely beautiful! So well thought out and executed.
ReplyDeleteThank you Rebecca
DeleteOMG April your quilting is absolutely outstanding on Carolyns quilt. In fact words fail me! Thank you so much for sharing your journey of the quilting and the life changes that went with it. Such inspiration for those of us on a beginning journey of quilting for others.
ReplyDeleteThank you Marlene
DeleteGood luck in your new journey.
Thank you so much for posting this. Not only is it beautifully quilted, I loved reading how you decide on the quilting designs etc. I've been making quilts for years, but only did minimal quilting on them. I have a chronic illness & fmq on a domestic machine is difficult. I purchase a Longarm a few months ago, now I enjoy quilting, but have no idea what to quilt. I learned a lot just from reading this & looking at the pics.
ReplyDeleteI am so happy that you enjoyed and learned some new tips from this blog. I hope you tons of fun days quilting on your New Longarm.
DeleteHow did you crosshatch around the centre appliqué? Did you sid or tie off? My father is loosing his sight to glaucoma & uveitis. He's a carpenter & likes to rebuild cars, he is distressed he can no longer do the things he loved. My mum has a terminal illness. I've boy, girl twins with special needs. Im a nurse, but developed a chronic illness from trying to do too much. You are giving yourself & your family a gift by recognising when you've taken on too much. One last thing, I read with interest about the rulers. I've a QA (r/h) mystical Mini on order & returned my unused HQ Little ruler a few days ago. After reading this I may need to buy it back �� Take care of yourself & best wishes to your family.
DeleteFor the crosshatching, I would SID. I try not to break thread if I don't have to. For the rulers I think that you can never have enough options. Thank you, Wendy
DeleteIt turned out beautiful. Thank you so much for sharing all of the details. Very inspiring.
ReplyDeleteFrom reading this post, it sounds like you still have your hands full. I wish you the best in everything!
Thank you Pamela
DeleteI do, I will still have quilts from others but it will be a lot less. My first client I will always quilt her quilts and maybe a custom quilt like this one, once a year. Also I would love to quilt for myself and every once in awhile put a quilt in a show.
What a beautiful quilt for both you and the lady that did the piecing. Been there too with the blue washout marker. The truth is you have to mark sometimes and sometimes getting it out is not so easy. I almost fainted when you were talking about the red fabric! It looks like many hours of quilting and you really turned it into an heirloom.
ReplyDeleteYou are so very right. I have had people tell me that they never mark or flip their quilt. With a custom quilt there is no way around either one of these. I'm just in search for the best method.
Delete